Imaging Upload
To view a demo of image upload visit here
flowchart TD;
    A[Qualified imaging collection]-->B[Site zips all imaging by individual timepoint];
    B-->C[Site uploads imaging];

    subgraph QC and Feedback
        C-->D{ };
        D{Passes QC?}-->|Yes|E[Reading process];
        D{Passes QC?}-->|No|F[Query site];
    end

    subgraph Reading Process
        E-->G[Central read];
        G-->H[Data locked];
        H-->I[Data export to sponsor];
    end
    F --> A
File Preparation
Please note that the software only accepts DICOM format for imaging files. All files must be in DICOM format and should be compressed into individual .zip files for each timepoint. Each individual timepoint must be separated into individual zip files. You cannot upload the entire subject in one upload. You must create separate uploads for each timepoint.
Please ensure that your imaging files are properly zipped before attempting to upload them to the software. A zip file is a compressed archive file that reduces the size of the files being uploaded and keeps them organized.
Here are some resources on how to create zip files:
- How to Create a ZIP File on Windows
- How to Create a ZIP File on Mac OS
- How to Create a ZIP File on Linux
Upload
Warning
All timepoints must be uploaded seperately. Do not include all imaging in one zip file. Failure to do so will require repeat uploads.
- Go to the upload tab
- Select Study and Site. If you do not see any Study or Site, you must request access to the study and site of your choice. See previous section.
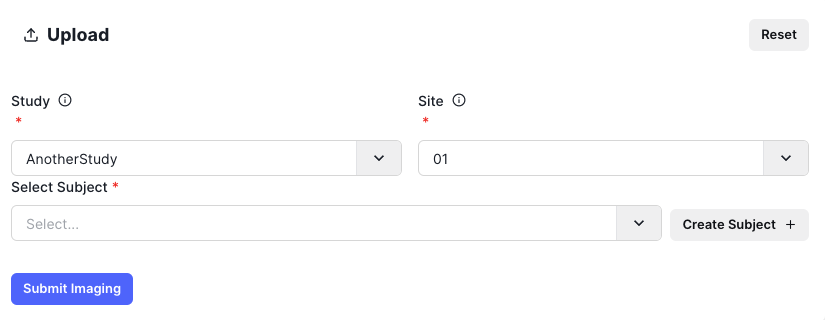
- Select subject or create subject by clicking on create subject:
- Enter the subject ID. Please ensure that the Subject ID follows the study convention (i.e. 1 vs 001)
- Enter Procedure Date or Time. This might differ depending on the study. Please refer to study specfic documentation if you have questions.
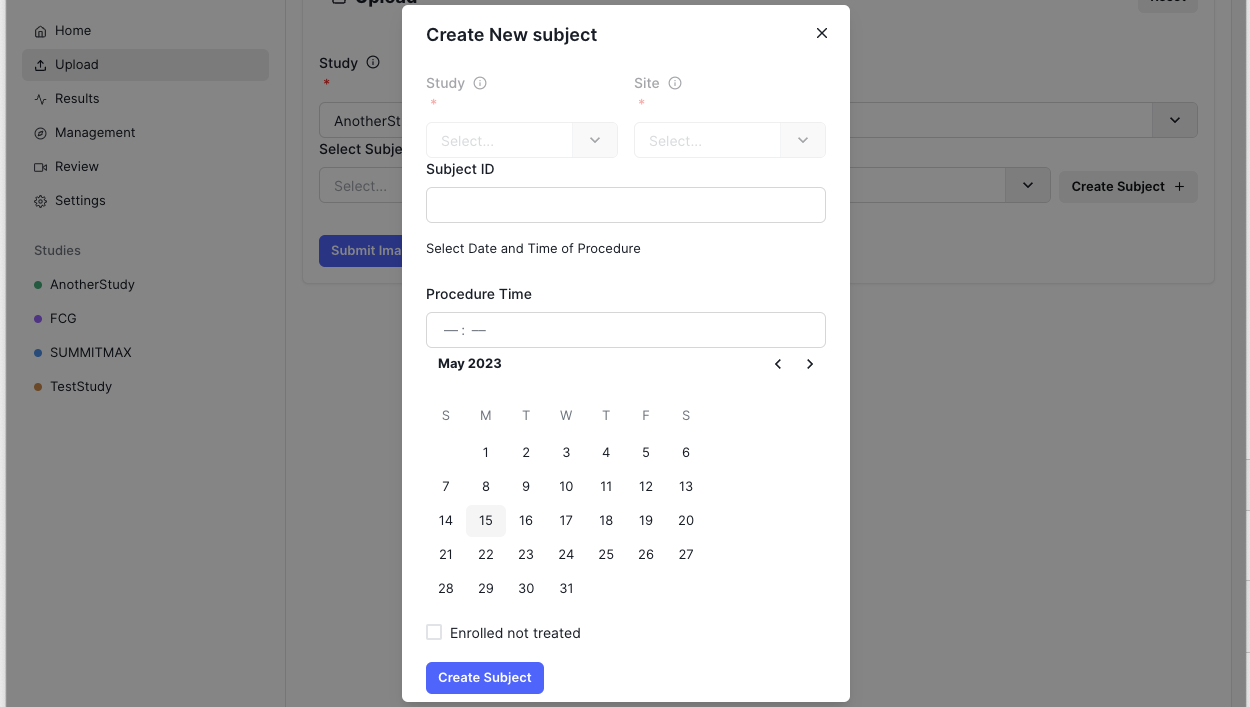
- Select imaging modality and/or type of imaging. If timepoint includes multiple seperate types of imaging, then select multiple.
- Select date and time of imaging. Allowable margin for error is 1 hour plus or minus.
- Include and comments you want to include for the central reader or imaging team.
- Drag and drop the single zip file for the select timepoint.
- Click submit. Once completed wait for an email confirmation or review your uploads in the results section.
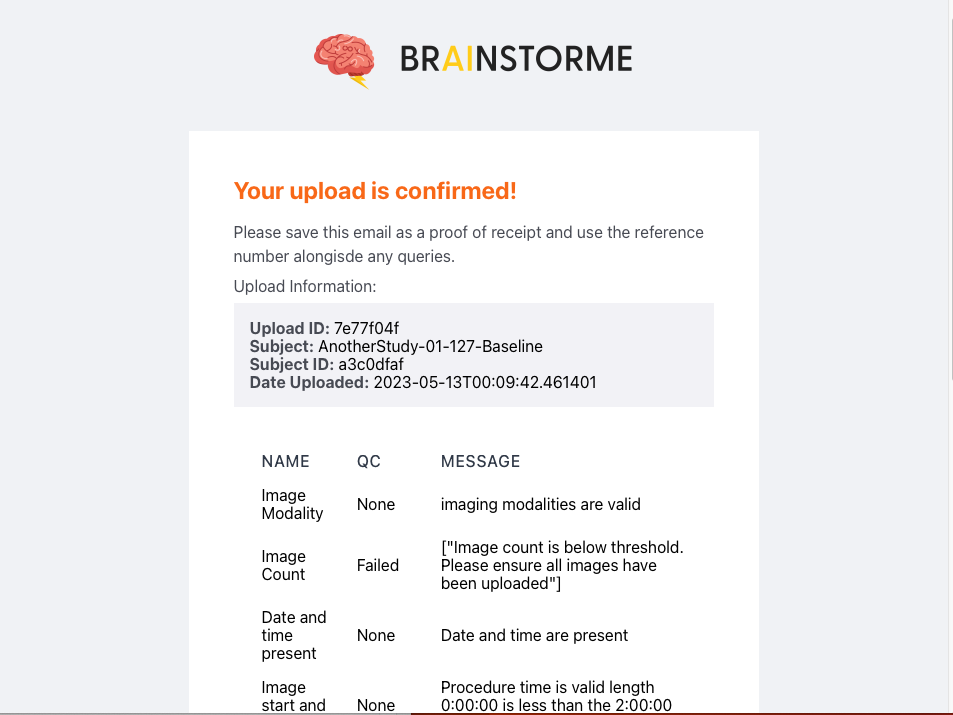
The email confirmation will come from support@brainstorme.com. It will look similar to the following: